Inflatable Camping Tent with Canopy: Quick Setup, Dry Camp
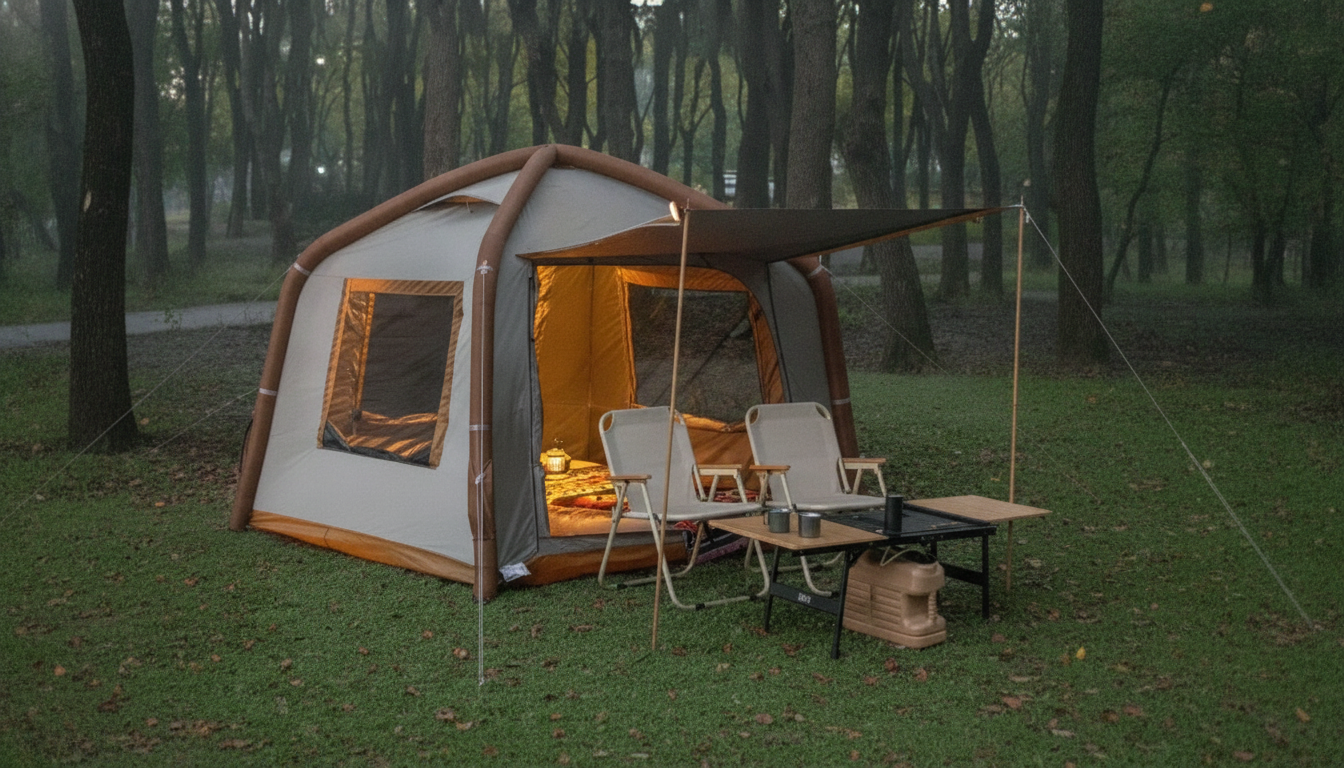
Automatic Inflatable Camping Tent with Canopy: Waterproof Shelter with Fast, Stress-Free Setup
An automatic inflatable tent is built for campers who want the speed of a quick pitch without the hassle of traditional poles. Add a canopy for extra shade and rain coverage, and the result is a versatile shelter that works well for car camping, beach days, festivals, and weekend getaways. This guide covers what to look for, a reliable setup routine, how to stay dry in wet weather, and practical canopy setups that make camp more comfortable.
What an automatic inflatable tent with canopy does differently
Instead of relying on a full set of rigid poles, inflatable camping tents use air beams to create structure. That usually means fewer parts to sort, fewer chances to misalign poles, and a frame that can flex a bit in gusts rather than fighting the wind.
- Air beams replace most poles: Setup tends to be faster and less fiddly, especially for solo campers or families juggling gear.
- A canopy adds usable living space: Think of it as a “front porch” for cooking prep, shoes, coolers, and sitting out light rain without tracking moisture into the sleeping area.
- Waterproofing depends on the whole build: Fabric coatings matter, but so do sealed seams, protected zippers, a raised “bathtub” floor, and proper tension when pitched.
- Best for comfort-first trips: Car camping, basecamp weekends, family camping, festivals, and anywhere speed beats ultralight packing.
Quick setup that stays solid: a dependable pitching routine
Inflatable tents reward good habits. A clean pitch helps the air beams stand in the right footprint, keeps the canopy from acting like a sail, and improves waterproof performance.
1) Choose the right spot
Pick slightly elevated ground when possible and avoid low spots where water can pool. Clear sharp rocks and sticks that can puncture a floor or grind into fabric overnight.
2) Lay out and orient
Before you stake anything, consider wind. If you can, face the main door and canopy away from prevailing gusts so the canopy edge doesn’t catch wind like a wing.
3) Stake the base first
Anchor the corners while the tent is flat. This keeps the footprint true as the beams inflate, helping doors zip smoothly and canopy lines align correctly.
4) Inflate gradually
Use the recommended pump and bring beams up to the suggested firmness. In hot sun, air expands—so over-inflating at noon can increase stress on seams later in the day.
5) Tension and guy-out
Attach guylines and tighten evenly. After 10–15 minutes, recheck tension as fabric relaxes and settles into shape.
6) Final canopy check
Make sure canopy fabric is taut and angled to shed water. Slack canopy panels are more likely to pool and drip where you least want it: right near the entrance.
Staying dry in real weather: waterproofing and condensation basics
“Waterproof” isn’t a single feature—it’s a system. The tent body, fly, floor, and the way you pitch all work together to keep water outside and reduce dampness inside.
For weather awareness and trip planning, check the National Weather Service safety resources before heading out.
Canopy comfort: shade, storage, and entrance control
| Setup style | Best for | How to pitch it | Watch-outs |
|---|---|---|---|
| High shade mode | Hot afternoons, lounging | Raise canopy edge and keep fabric taut | More wind load; add guylines |
| Rain-shed mode | Light to moderate rain | Angle canopy downward away from door | Avoid pooling; re-tension as fabric relaxes |
| Wind-stable mode | Gusty campsites, open fields | Lower canopy profile, stake wide, tighten guylines | Don’t over-tighten to the point of stressing seams |
| Gear porch mode | Wet/muddy conditions | Keep canopy edge slightly lower to shield entrance | Ensure airflow to reduce dampness |
Care and maintenance for inflatable air beams and waterproof fabric
For a deeper cleaning and storage routine, the REI tent care basics guide is a helpful reference.
Is this style right for your trips? A practical fit check
To reduce surprises on arrival—especially with weather shifts—follow the Leave No Trace “Plan Ahead and Prepare” guidance and build a simple setup checklist.
Featured picks available now
- Automatic Inflatable Camping Tent with Canopy – Waterproof & Easy Setup
- Interactive Soccer Table Game for Kids (a camp-friendly activity for downtime under the canopy)
- Professional 1875W Hair Dryer with Negative Ions & Brushless Motor for Fast Drying (useful where power is available for drying after rain or swims)
FAQ
How long does an inflatable camping tent take to set up?
Most inflatable tents go up in about 5–15 minutes: stake the corners, inflate the beams, then guy-out and tension. First-time setup can take closer to 15–25 minutes depending on wind, pump type, and how many guylines you use.
Are inflatable tents truly waterproof in heavy rain?
They can be, but performance depends on sealed seams, effective coatings, fly tension, and good drainage around the site. Keep the rainfly and canopy taut to prevent pooling, and manage canopy runoff so it doesn’t flow under the floor edge.
What should be done if an air beam slowly loses pressure overnight?
Check the valve first: remove grit, reseat the cap, and make sure the seal is clean. If it continues, use a light soapy-water wipe to find bubbles, patch the leak per the repair kit instructions, and avoid overinflation during hot parts of the day when pressure can spike.














Leave a comment